
Hello my crafty friends! It’s Raquel Mason here today. I hear the same complaint from many women that they find masculine cards harder than feminine cards to create. I’ll let you in on a secret: I agree with those women. I am here today to help everyone create a masculine card that is easy and sure to make him chuckle. Let me show you how I made this “Nutty” card.


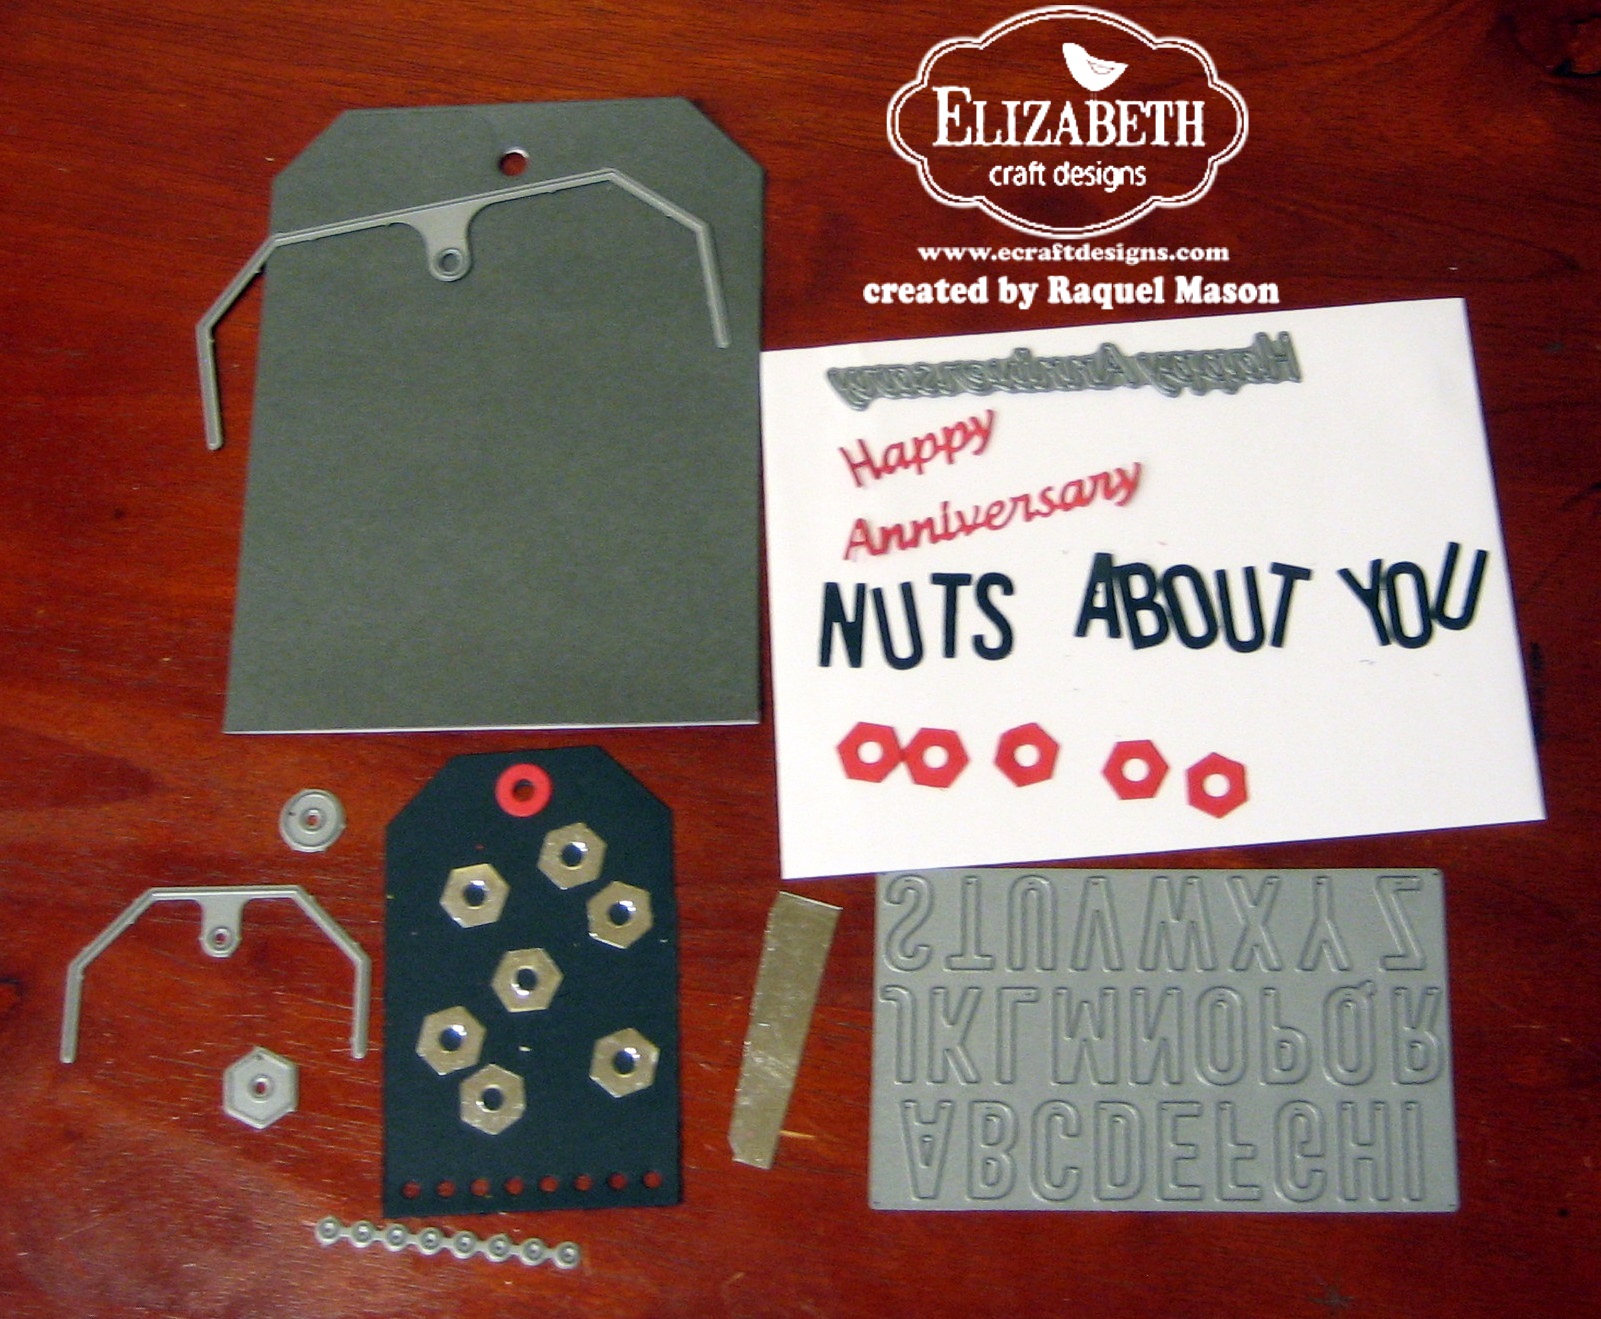
1. Cut gray cardstock 5-1/2″ x 8-1/2″ and score at 4-3/4″ for a standard A2 sized card. Keep the card folded in half and use Tags & More 8 tag-shape die to die cut the card base.
2. Before doing the next steps, adhere flat sheets of Transparent Double-Sided Adhesive on your cardstock before die cutting but do not remove the backing. Cut black cardstock 2″ x 4″. Cut red cardstock 1-3/4″ x 3-3/4″. Adhere red cardstock on top of black cardstock.
3. Before doing the next steps, adhere Transparent Double-Sided Adhesive on your cardstock and Shimmer Sheetz before die cutting but do not remove the backing. Die cut the pieces shown in photo below:
- Cut black cardstock 2-1/4″ x 3-1/2″ then die cut using Tags & More 5 tag-shape die. Die cut little circles at the bottom of the black tag using the die shown below.
- Using scrap black cardstock, die cut “Nuts about you” using Alphabet 1.
- Using scrap red cardstock, die cut (1) reinforcement circle, (5) hexagons from Tags & More 5 and Happy Anniversary.
- Using scrap Silver Metallic Shimmer Sheetz, die cut (7) hexagons and a 1/2″ x 2-1/4″ strip to be adhered behind the small circles on the black tag. Remember to use the Metal Adaptor Plate when die cutting Shimmer Sheetz.

4. Adhere “Nuts about you” on the red cardstock from step 2 to the bottom of the card base.
5. Adhere Silver Metallic hexagons randomly onto the black tag. Adhere the red reinforcement circle on the top of the black tag. Adhere to the card base. Use photo for placement.
6. Adhere red reinforcement circles to the inside of the card. Adhere “Happy Anniversary” to the right side of the card.
Optional: make a coordinating envelope by adhering red hexagons to the bottom corner.
I hope you have enjoyed this tutorial and feel inspired to try it out yourself. Happy Crafting!
SUPPLIES:
Elizabeth Craft Designs:
SS0211 Silver Metallic Shimmer Sheetz
803 Metal Adaptor Plate
Transparent Double-Sided Adhesive
Other:
Basic Gray, Real Red & Basic Black cardstock – Stampin’ Up!
Wrench Brad – Eyelet Outlet


Cute and fun pun card! 🙂
What a great guy card
I am nuts about this card! Clever use of hexagon die!
such a fun guy card!
What a clever guy card. Love that it can be used for any occasion.
so cute!!
You’re right, Raquel! Making cards for the guys is always a bit more challenging. This is a great way to solve the problem and by changing the greeting inside it’s perfect for birthdays and other occasions, too.