


Hello everyone and happy Saturday! It´s Sanna Lippert here again today with my September guest design team card project share. Who does not love some sparkle in their holiday cards? Well I sure do! Thus, for today´s project I used the gorgeous new Holiday dies by Joset and created two cards. Here they are:

Here is how I created the card(s):

Step 1: Take the slimline background die and die cut a piece of Clear Double Sided Adhesive with it. Then remove the negative pieces.

Step 2: Next die cut a second – plain piece – of Clear Double Sided Adhesive Sheet in the same size like the slimline background die.

Step 3: Take a slimline card base and adhere the solid adhesive piece onto the card and carefully remove the protective layer without touching it with your fingers.

Step 4: Now place the die cut background adhesive piece on top of the first layer of adhesive, but leave the protective cover on for now.


Step 5: Pick three colours of blue-toned Silk Microfine Glitter and pour them onto the adhesive areas creating an ombré look with the colours. Wipe any residue off with a brush and polish the layer with your finger.


Step 6: Now remove the slimline background die cut piece´s protective cover and pour Silverado Silk Microfine Glitter onto the adhesive areas. Again remove any residue glitter with a brush and then polish the layer with your finger. Also save the protective cover pieces for later – you will need the for the second card.


Step 7: Stamp a sentiment onto a whipe piece of paper with two blue tones of Distress Oxide inks and then die cut it using the Fitted Circles die cut dies. Decorate with inked banners if you want. For finishing touches add a few Craft Drops to the card.
Now use the leftover protective cover from the slimline background die to create a fun, second card.

Here are the steps you need to do:


Step 1: Ink a slimline card base using two light shades of Distress Oxide blues. Then place the protective cover leftover piece on top of the inked card. Use painters tape or washi tape to hold the pieces on place while inking. Then add a darker blue shade of Distress Oxide thru the DIY stencil.


Step 2: Die cut snowflakes from a piece of Clear Double Sided Adhesive Sheet and adhere them onto the inked slimline card base. Pour Pewter Silk Microfine Glitter onto the adhesive stars and polish into place. Then stamp a stentiment onto carstock and die cut with banners if you want to. Adhere on place. Decorate the edges with “faux stitching” using a white gel pen. How fast and easy you can make this second card from leftover pieces of the first one!
Here are some close-ups of the finished cards. If you want to purchase the here featured Christmas special die and stamp kit, ask your local craft store or wait until it will be available at the online store. I truly adore this kit and cannot wait to create more Holiday cards with it!


I hope you enjoyed this card set tutorial! See you again next month with another card idea.
xxx, Sanna
Supplies:
Elizabeth Craft Desings:

Other:
Distress Oxide Inks by Ranger Inc.
Blending Brush
Sizzix Big Shot A4 die cutting machine
Signo uni-ball white gel pen


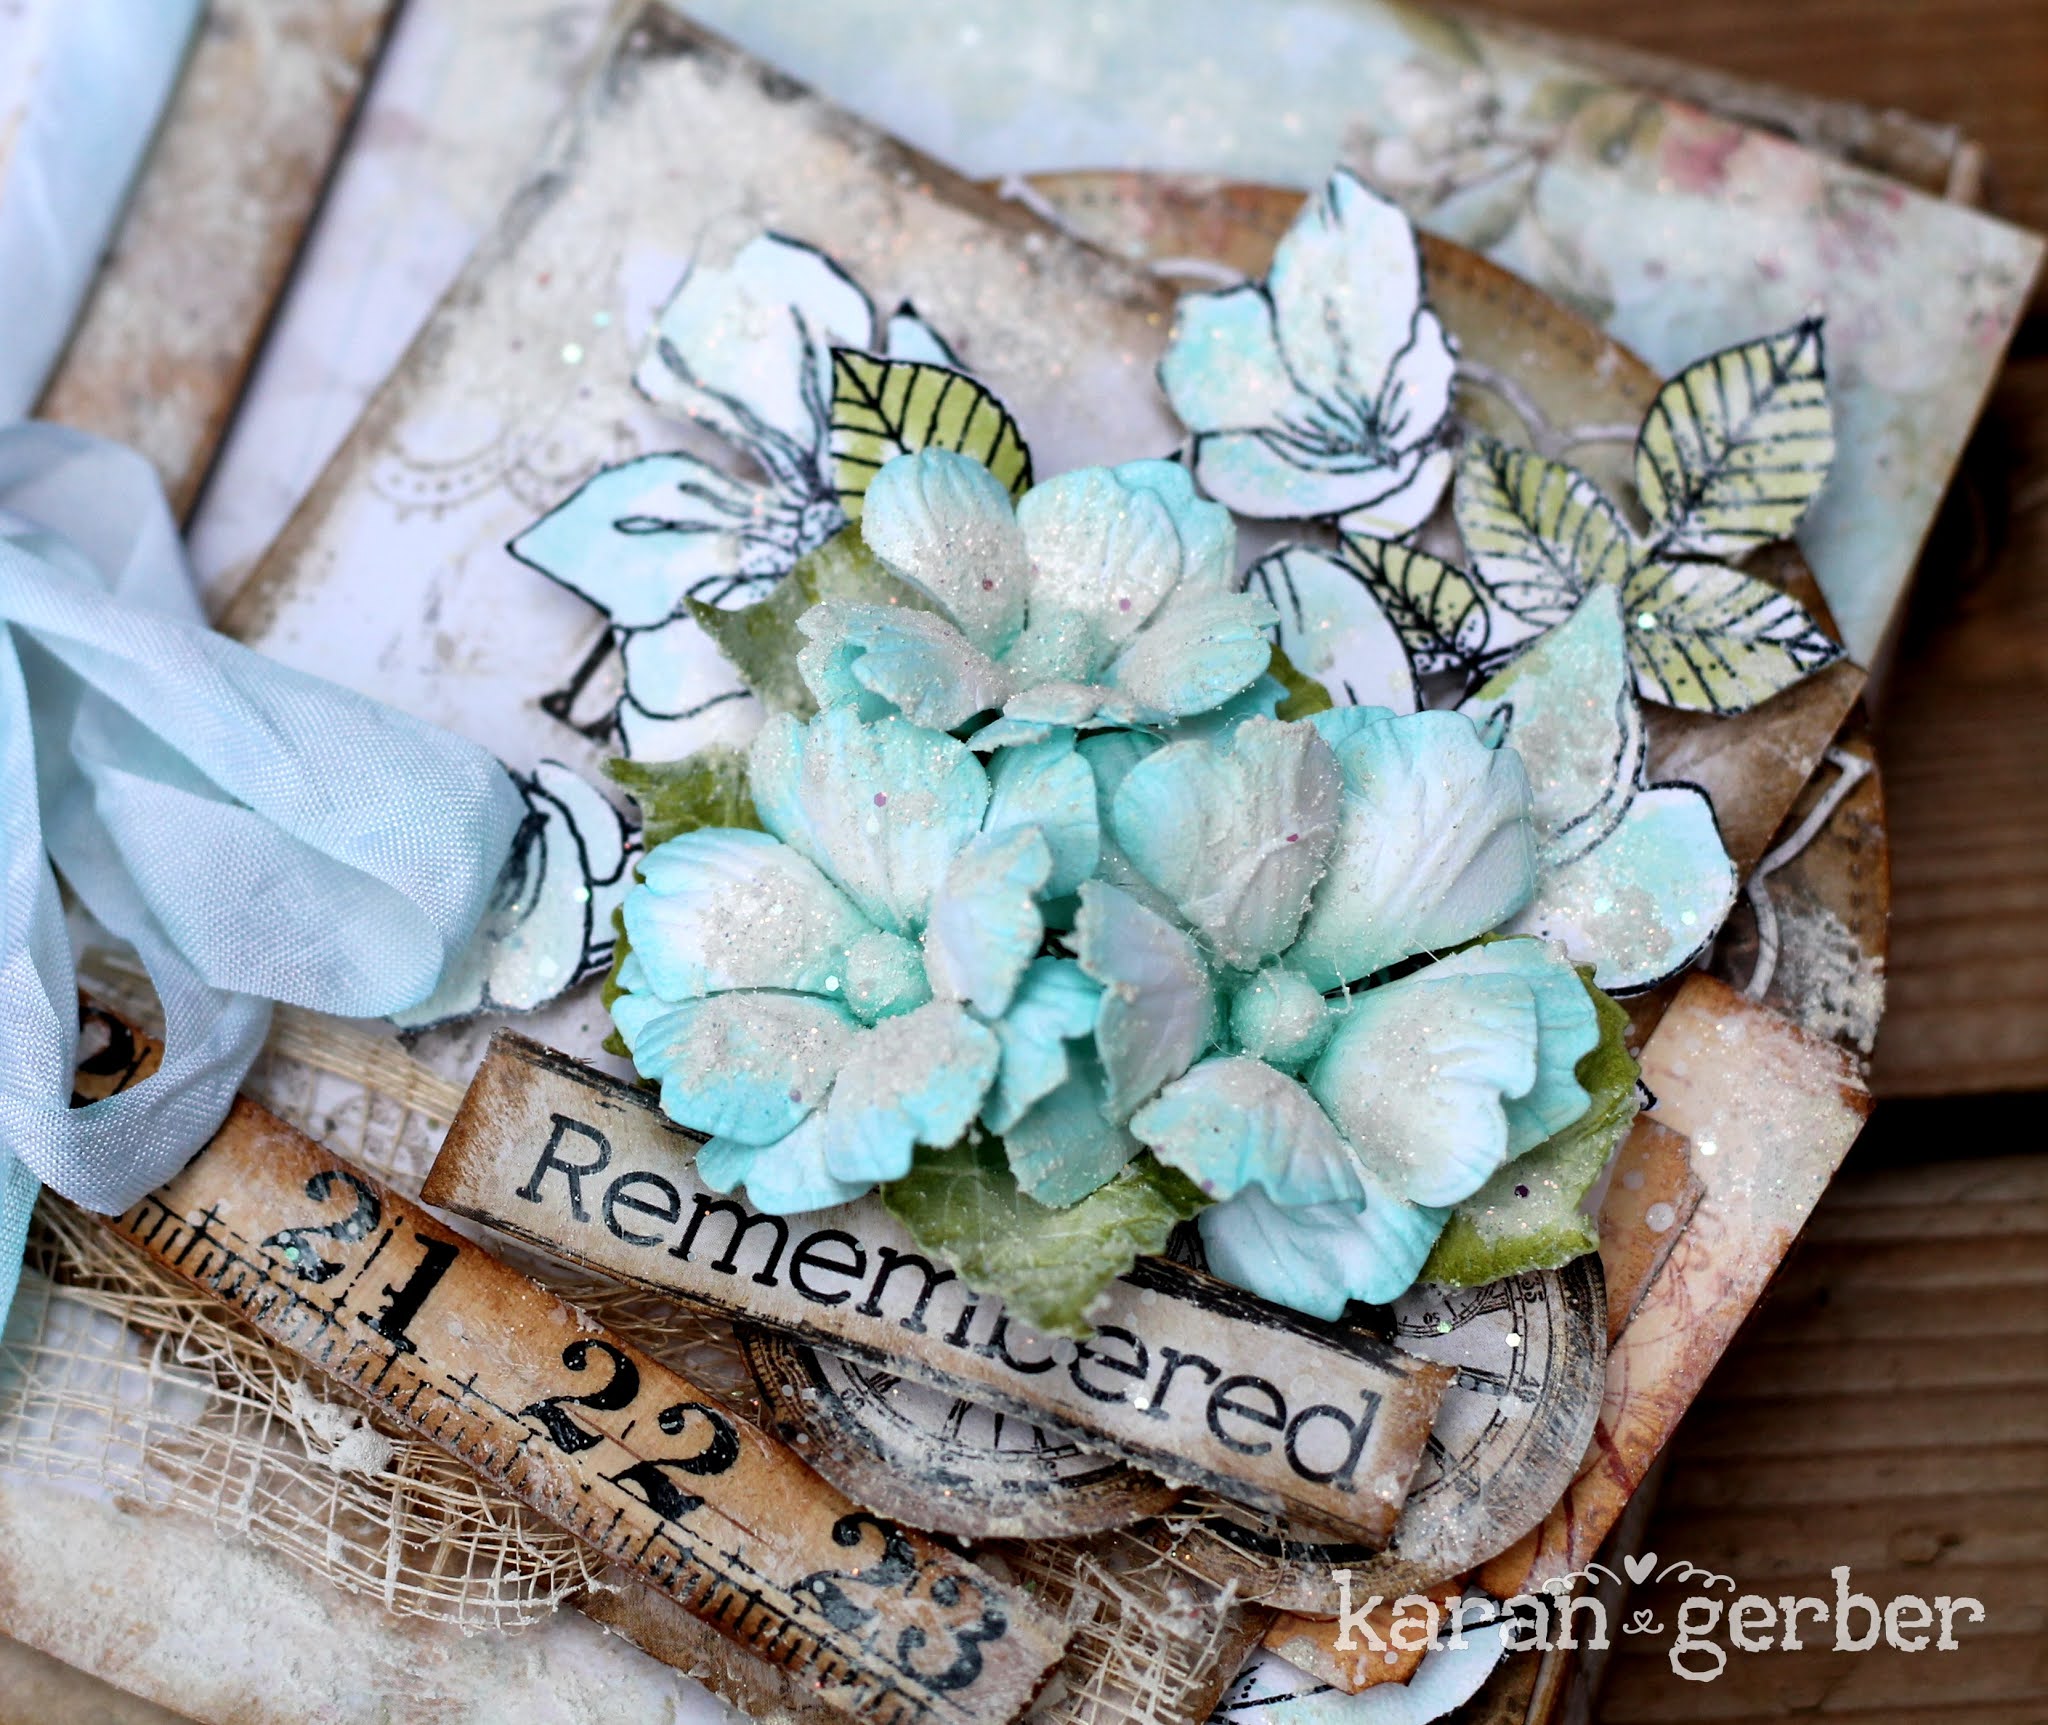
Hello Friends and welcome to the Elizabeth Crafts Blog. It is Karan here sharing a card with you today. I wanted to share with you the versatility of the Art Journal Dies and showcase a couple of them on a card.

This is designed with Florals 11; Sealed Pocket, and Puzzle Page Die. I know, you know, how much i love that Stitched Fishtail for my sentiments and the Stitched Rectangle just to add an extra layer to my cards. The Hope Floral Stamps are fabulous to add some added detail and tuck in to match the florals i create, I loved coloring them with ink, or water color they add that perfect touch.

Above is my card it measures 5.5 x 7.5, a big over sized for envelopes, but you can always attach this to a gift bag, or create a hand made envelope using an envelope maker.

you can see the detail of the fishtail die, the Sealed Pocket and the gorgeous florals here. I colored the florals using Tea Rose Archival Ink, and Peeled Paint Distress Ink on the leaves.

here are a few detail shots for you.

and finally a side view. I hope you have enjoyed my card that i have shared with you today. Please share your creations with us over on the Elizabeth Craft Designs Family Facebook Group.

Product Information:


Hi there,
it’s Tanja here and today I would like to show you how to create this monochromatic watercolor greeting card.
Step 1: Stamping

Step 2: Coloring

Step 3: Finishing Touches


I hope you got inspired.
Hugs,

Supplies:
ECD
Kindness Stamp Set
watercolor paper
Watercolor Palette
Other:
Distress Ink Shaded Lilac
patterned paper
rub-ons


Hello! Welcome – Samantha here. Today I’m sharing this fun card! This zebra is one of my favourite animal dies from Elizabeth Craft Designs. I decided to create a 60’s vibe background with some planner stamps and dies – the only thing missing is the shiny disco ball!
Card Instructions:
Step 1: On Copic friendly card. stamp a row of the Background 3 stamp as shown below.

Step 2: Using Copic markers colour in the small squares. Use different colours and continue to colour until you are happy with the desired look.


Step 3: Trim the card front to measure: 10.5cm x 14.5cm
Step 4: Die cut the zebra, colour in the zebra stripes, then assemble the zebra and adhere to the card front.

Step 5: Using embossing ink stamp the sentiment – from Safari Sayings clear stamp set then apply a generous amount of white embossing powder. Heat to set the embossing powder. Die cut the sentiment using the Puzzle Page Art Journal die

Step 6: Adhere the sentiment to the card front. Embellish with sequins and a twine bow. Die cut the music notes from Planner Essentials 10 and adhere to the card front.
Step 7: Adhere the card front to an A6 card base.

Hope you enjoyed today’s tutorial – a bright colourful card to celebrate the party animal in all of us!
Happy Crafting!
Samantha
Supplies Used:
Others:
Copic Friendly Cardstock
Copic Markers
Black Cardstock
Sequins
Twine
Die-Cutting Machine
Clear Stamping Block
Gluedots/Foam tape
Scissors/Paper Trimmer
Embossing Ink
White Embossing Powder
Embossing Ink
Liquid Adhesive – Glue Pen


Hello Friends and Welcome to the EC Designs Blog. It is Karan here to share a project with you.
I know it has been awhile since i have posted crafty projects with our big move almost behind us, i am slowly getting back to creating. My first project is using their floral stamps and beautiful floral dies creating a gorgeous mini album.

My first project back is Designed using Florals 13. Which i have shaped into Wild Roses. I matched the color of them with the paper i used in my project. Using a foam bud as my center.

Stamping the Blossom set out on Soft Petal Cardstock from Elizabeth Crafts with black archival ink, i decided to use my water brush and dab color from the same pad i used to create my florals. Salvaged Patina Distress Ink.
This project is designed as a mini folio on 49 and Market Accordion Flip Fold which comes with their new album as an insert. I thought it would make a perfect mini.
The inside i still want to decorate but my new scrap space is very much in boxes, but i promise i will add more photos when i get to my Planner dies.


I hope you have enjoyed my share with you today and I have inspired you to create your own beautiful mini albums.
Products Used:


Hello everyone, it´s Sanna Lippert here again with another guest design team card project share. Today I´m stopping by to share a set of mixed media cards with plenty of white space on them – and colour. I love adding stenciling, droplets and a fun mixed media twist to cards and I´d tought I´d share one of those ideas today with you. Hope you like it!

And here is how created the cards:


Step 1: Take a small gelli plate and apply three colours of alcohol ink onto it. Then take a plain brayer and roll the colour onto the gelli plate to create a faded three-tone-look. After that take a mark making tool of some kind – I used a dotted and a striped brayer – and press it/roll it over the inked layer to create a pattern. Let dry a bit.


Step 2: Next apply a thin layer of white paint over the inked pattern and then place the pattern color down onto the paper and press down to paper with your hands. Then remove the gelli plate and you have a nice pattern to use for your cards. Repeat several times with various colours and mark making tools (you can use stamps, combs, printing tools or even items from your kitchen). Whatever you find suits your project. Next die cut the created patterns into circles using the Fitted Circles die cut die and your die cutting machine.


Step 3: Next grab the Make Your Mark stencil and create patterns to white card backgrounds using the stencil with Distress Oxide tones and an ink blending tool/brush. On some I used just one colour and pattern and on other backgrounds I added two ink tones and the same pattern vertically and horizontally. You can do whatever you find attractive for your project.


Step 4: Now apply a Clear Double Sided Adhesive Sheet onto a piece of Soft Finish Cardstock and die cut the leaves for each card using the Sidekick Essentials 7 die set. After that stamp sentiments using embossing ink and the Build Your Own Sentiments 1 stamp set onto black cardstock. Then add white embossing powder onto the stamped areas, dabb the residue off and heat set with a heat tool. Now adhere the leaves onto the card base. I arranged them around the circle piece to create a cluster, because I like it that way. It leaves plenty of white space to the card still.
Then adhere the circle using 3D foam adhesive pads. This creates a bit more texture and interest to the card. After that grab some water colours (I used black on my cards) and add droplets with the water colour to the cards. Let the droplets dry properly and then finish the card off by adding the embossed sentiment on top of the circle piece and if you want, add a few buttons for additional decor. I adhered the buttons with Clear Double Sided Adhesive Tape to the card. For additional decor you can also add some Craft Drops to the cards in various colours in the very end. Make sure you let the drops dry properly, before mailing your cards, otherwise they might smear.

Here are the finished cards:


When creating cards like this, I like to use the same basic idea, but do slight variations. That way every card is still unique, but since I already have all the tools out, I get more cards done at once. You never know when you need one!
I hope you enjoyed this idea and give it a try yourself. You can also replace the alcohol inks with paint, if you don´t happen to own any. Also if you don´t own a gelli plate (or you are not that much of a mixed media person), replace this step by just die cutting a fun patterned paper for the circle piece.
See you again next month with another card tutorial. Wishing you all a fabulous August!!
xxx, Sanna
Supplies:
Elizabeth Craft Designs:

Other:
Sizzix Big Shot A4
Distess Oxide Inks by Ranger Inc.
Ink Blending tool by Ranger Inc.
Nuvo Embossing Ink by Tonic Studios
Paint Brush
Gelli Plate by Gelli Arts
Brayers (plain and patterned)
Alcohol Inks by Ranger Inc.
White acrylic paint
Heat tool by Ranger Inc.
White Embossing powder by Ranger Inc.
3D foam pads
Scissors and buttons
Acrylic block for stamping


Hi there,
It’s Tanja here and today I would like to show you how to create this loose watercolor tag.
Step 1: Stamping

Step 2: Adding Color


Step 3: Finishing Touches


I hope you got inspired.
Hugs,
Supplies:
ECD
Blossom
Planner Essentials 2
Watercolor Palette
Background Stamps 2
watercolor paper
Other
Versafine Clair (Morning Mist, Nocturne)
Distress Ink (Dusty Concord, Black Soot)
seam binding

Hello everyone, it’s Sanna here today with another guest design team project. This card idea originated from a wish to have a die that could cut chevron type backgrounds, which I didn’t own. But then I figured, I actually could use my existing dies to create a chevron pattern as a card background. And while I die cut the “chevrons”, I had plenty of pieces left to create two more fun cards. So one basic idea led to a set of cards that I’m quite happy with.
Here is how I created this card:

Step 1: I first die cut “frames” with the Stitched Rectangles die set by using the largest and the third largest die from the set. This way I had a bigger frame than if I had used the next to largest with the biggest size. I picked yummy, summery pastel cardstock for die cutting. I also kept the stitched rectangle pieces for later. You will see how I used them on the two cards to follow.
Step 2: After die cutting the frames I then took a card base and arranged the corners onto it in such manner, that they formed a “chevron” and marked the edges with a pencil. This way it was easier to know where to cut later. After that I just adhered the piece onto the card base with Clear Double Sided Adhesive Tape. Out of each frame I got two bigger parts for the chevron pattern and I also saved the smaller ones for the lower and the higher corners. So for this size of a card you only need 4 frames in total.
Step 3: After adhering all the corners onto the card base I took the Planner Essentials 21 “Note Pieces” set and die cut a focal point for the card from black cardstock.
Step 4: I then added a stamped and embossed sentiment using the Planner Essentials “Remember” stamp set with neon green embossing powder. After that I just adhered the sentiment with 3D foam onto the card to create more texture and interest. For finishing touches I added a few craft drops for decor. The residue pieces then let to the second card:

For this one I did the following steps with the residue papers I had left over from my first card:


Step 1 to 3: I placed the stitched rectangle cardstock pieces onto my die cutting machine and places a stitched oval die onto the middle of them and die cut 4 pieces to create the oval background piece for the next card. After that I took a leftover strip of the light blue cardstock and attached Clear Double Sided Adhesive Sheet onto it and die cut two “Budding Florals” for the card.
I then adhered the flowers on place, applied some liquid adhesive and loose golden glitter onto the upper area of the buds and let that dry. After the adhesive was dry, I just tabbed the residue glitter off. For the sentiment I used the General Sentiments stamp set with white embossing powder and a piece of black cardstock that was die cut with the Fitted Fishtail dies. Very easy, but still very colorful thanks to the multi-colored background piece. This then led to my last card project:

For this card I used the final stitched rectangle pieces, as shown in the steps here:


Step 1 to 3: I arranged the leftover pieces from the previous card onto the card base and cut them into size so that they filled the whole background. Then I die cut a focal piece from white cardstock using the Stitched Circles die cut die. I stamped and embossed a sentiment (using General Sentiments) and florals (using the Spring Fling stamp set) and golden as well as light green and pink embossing powders.
After embossing I inked the circle light yellow with Distress Ink. Next I die cut a piece of golden glitter carstock with the Scalloped stitched circle die to place under the sentiment piece and finished the focal piece off with some Fitted Fishtail dies.
So one idea led to a set of three fun cards and I basically worked with the same paper pieces from start to finish. Here are some close-ups of the finished cards:


I hope I could inspire you to take a second look at your basic dies to use them in a little different way! I´d love to see what kind of ideas you come up with. Wishing you a fabulous July and see you again next month with another card idea!
Happy crafting,
xxx, Sanna
Supplies:
Elizabeth Craft Designs:

Other:
Sizzix Big Shot A4
Pink, black, light green, yellow and blue cardstock
Embossing powder by Ranger and American Crafts
Golden glitter cardstock
3D foam squares
Heat tool – Ranger
Loose golden glitter


Hello there everyone, it’s Sanna Lippert here again with another guest design team project. For today’s cards I created a set of two masculine, clean and simple, graduation cards. As my son finished high school level and exams this June, I need a nice card for his graduation festivities.

I used woodgrain patterned paper and instead of flowers, just leaves to add a special touch to the card. Also, the leaves are done out of Shimmer Sheets, to add just a touch of festivity to the card. Here is how the card is done:

Step 1: Take light blue Soft Finish Cardstock and using the Summer Fun Sentiments stamp set and grey Distress Oxide stamp ink, stamp the sentiment “well done” onto the carstock.

Step 2: Next die cut a piece of woodgrain paper using the Stitched Rounded Rectangles die cut die and then stamp “I´m so proud of you” with black stamp ink onto it using the Build Your Own Sentiment 1 stamp set.

Step 3: Take a darker blue toned cardstock to mat the stamped cardstock strip. This will make the stamped element stand out more from the background. Then adhere the pieces onto the cardbase.
Step 4: Take a piece of Shimmer Sheet and apply a Clear Double Sided Adhesive sheet onto it. Now run the sheet thru your die cutting machine, but don´t die cut the image thru (don´t use a metal plate in your die cutting machine). This way you will get an embossed image. Next take your precision scissors and cut around the edges of the “embossed” image.

Step 5: Adhere everything on place and add some faux stitching around the edges to finish off the card. Optionally you can also add a few Craft Drops for decor or leave the card as it is. You now have a easy-to-mail, flat, yet decorative, masculine card done.


Since I had all the products alraedy on my desk, I also did a second card using the same basic idea and the same products, but modified the idea a little. This is a great way to strech one basic idea and make several variations of it at once. Besides, it is always good to have a card or two for just in case as backup!


I hope I could inspire you to create masculine clean-and-simple styled cards yourself! See you again next month with another card tutorial. Until then, wishing you a lovely June.
Happy crafting,
Sanna
Supplies:
Elizabeth Craft Designs:

Other:
Sizzix Big Shot A4
Ranger Distress Oxide Iced Spruce
Acrylic block for stamping
Hero Arts Black Chalkboard stamp ink
3D adhesive foam
