

Hi there,
It’s Tanja here and today I would like to show you how to create this sweet Girl Scarecrow.
Step 1: Die-Cutting
- die cut all the elements needed to create the scarecrow from white Soft Finish Cardstock using the Scarecrow and the Holiday Elf Hers die sets

Step 2: Coloring and Assembly
- color the elements using Alcohol Markers
- assemble the scarecrow using liquid glue

Step 3: Creating the Background
- cut out a hill shape using the Adventure Edges 2 die set and kraft cardstock
- add clouds with the help of a cloud stencil, Distress Oxide Ink Tumbled Glass and a Blending Brush
- stamp the sentiment from the Autumn Words stamp set with Versamark and heat-emboss it with WOW! Bright White Super Fine embossing powder

Step 4: Finishing Touches
- add highlights with a white gel pen
- add a strip of brown foiled cardstock to the left and right of the panel before adhering it to the cardbase


I hope you got inspired.
Hugs,

Supplies:
Elizabeth Craft Designs

Other
Alcohol Marker
white gel pen
Cloud Stencil
Kraft Cardstock
Distress Oxide Ink Tumbled Glass
Versamark
WOW! Bright White Super Fine embossing powder
foiled cardstock


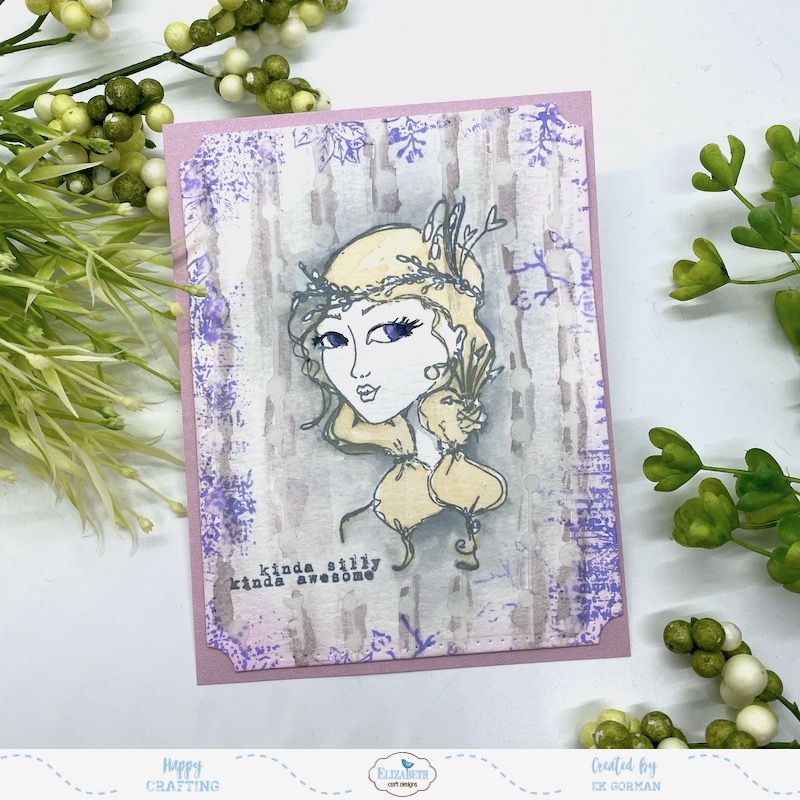 Hey Friends! It’s EK and today I thought it might be fun to try to create a modern take on a vintage look. Designer Ilse and Charlene’s new stamps and stencils make creating this look so simple with their old school flare.
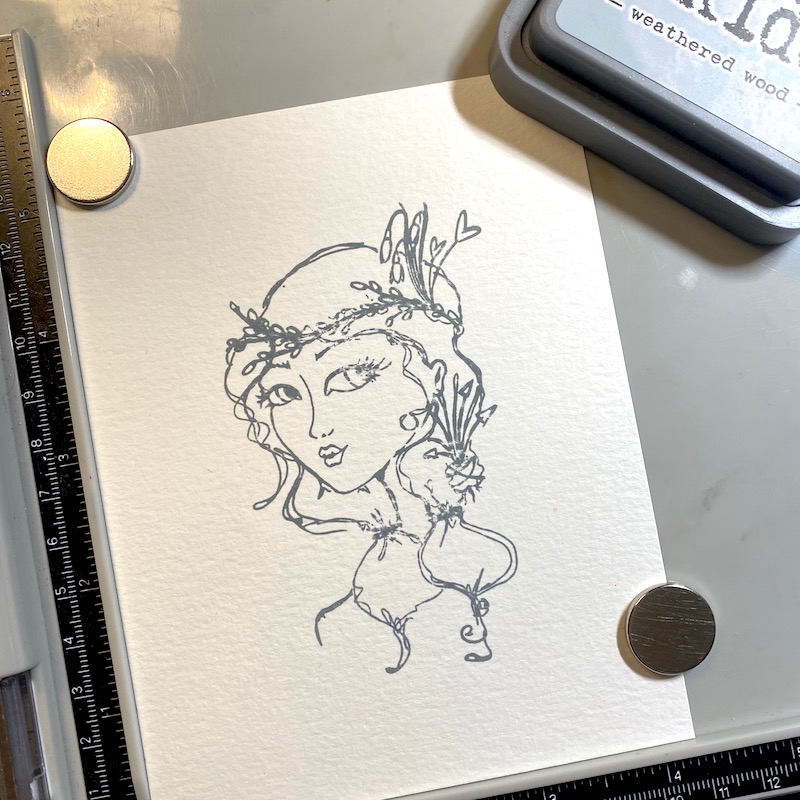 Step One: Stamp out on of the images from the Earthy Girls stamp set onto a piece of Watercolor Paper cut out to 4.25×5.5 inches using some water-soluble ink. I used Weathered Wood Distress Oxide.
 Step Two: Using clean water and watercolor paint brush, fade the ink out over the watercolor paper, making the stamped image look bright and bold.
 Step Three: Using ECD’s Watercolor Palette, add touches of color to the stamped image.
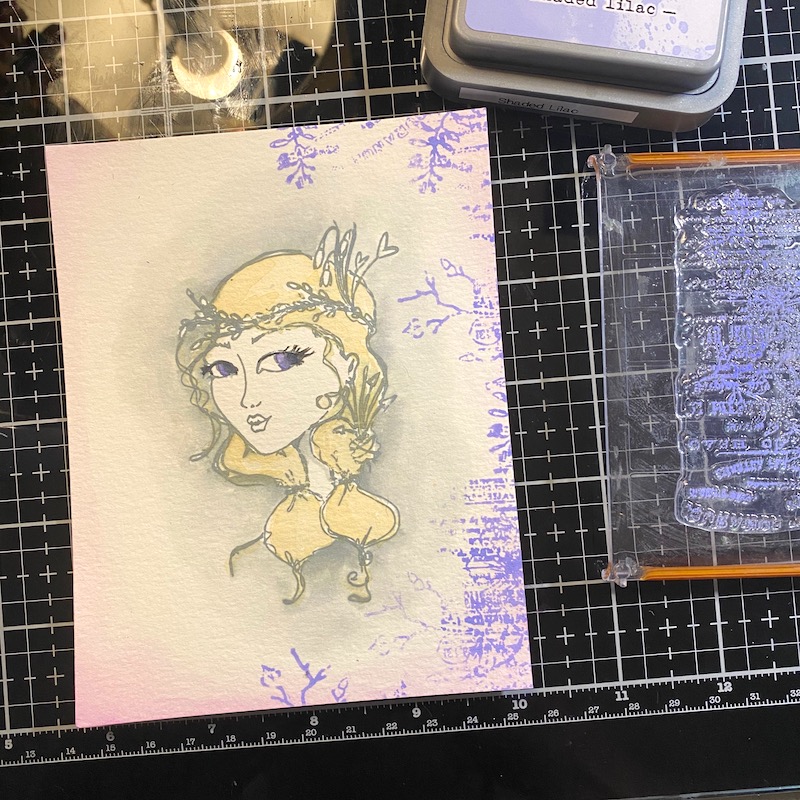 Step Four: Hand stamp around the edges of the watercolor paper background images from the Words & Layers stamp set using colored ink. I used Shaded Lilac in Distress Oxide.
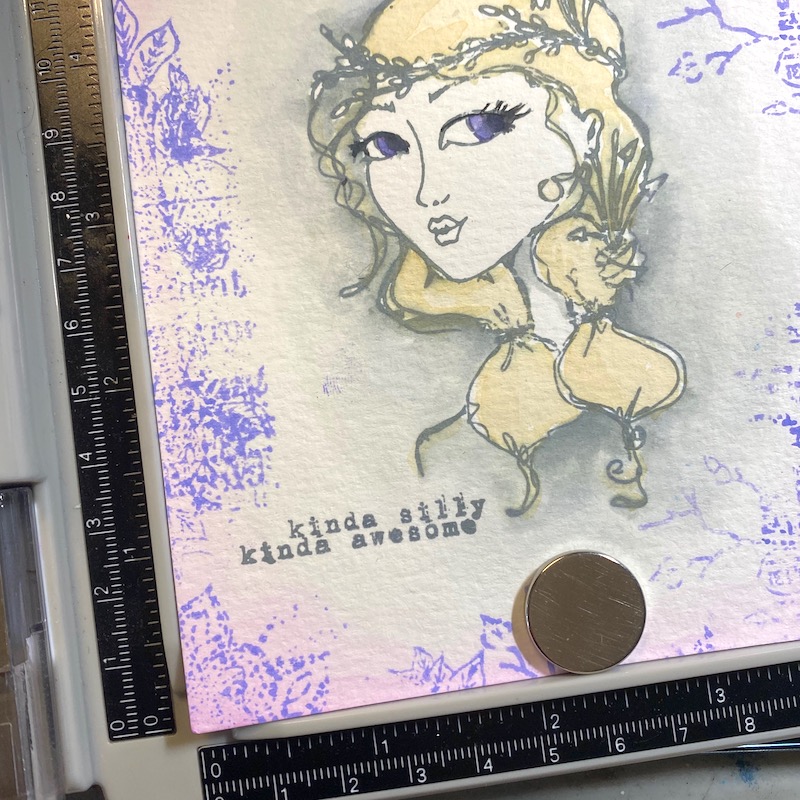 Step Five: Add a sentiment to the image from the Words & Layers stamp set. I used Weathered Wood Distress Oxide.
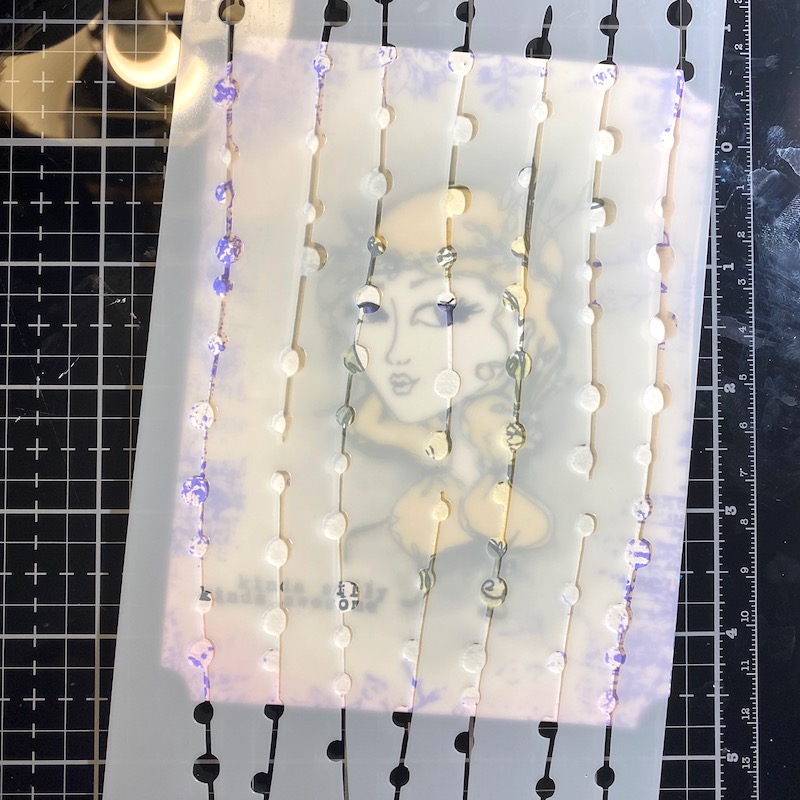 Step Six: Add texture to the card using the Dot Dot Dot… stencil and add gel medium through the openings.
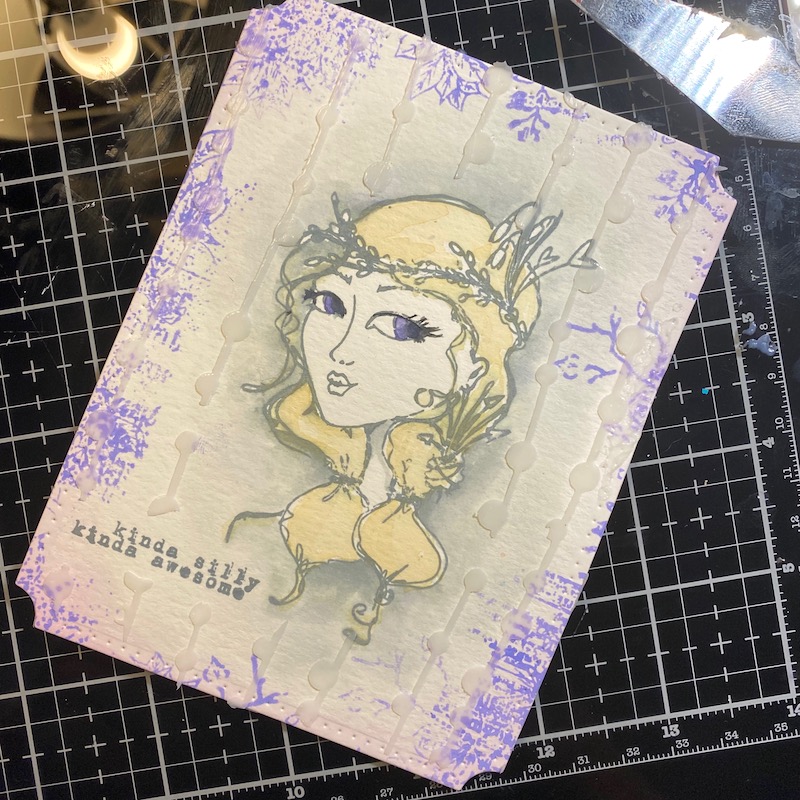 Step Seven: Let the gel medium dry.
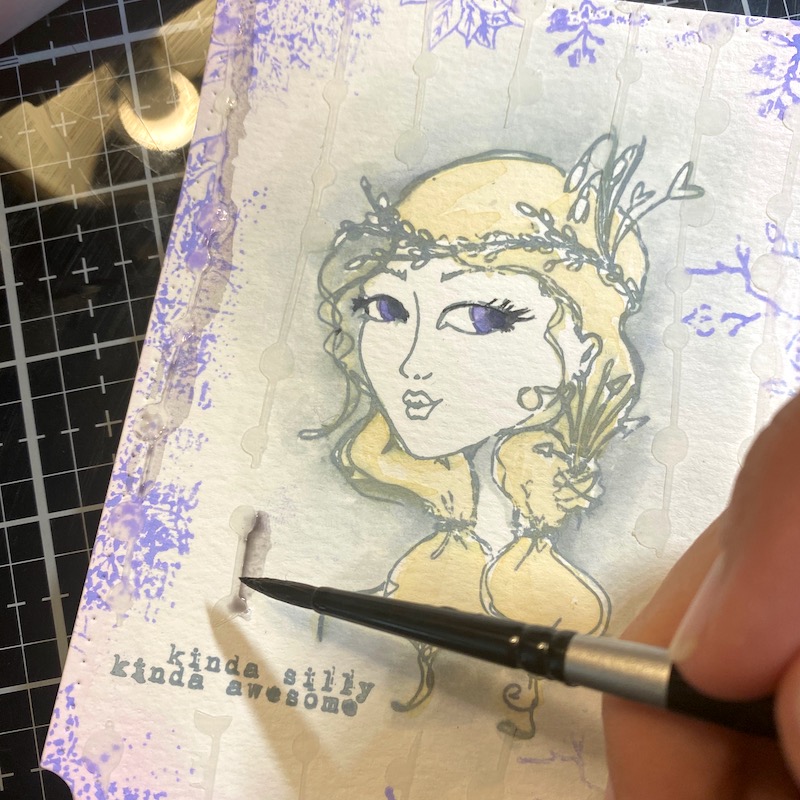 Step Eight: Highlight the stenciling by adding muted watercolor around the raised portions.
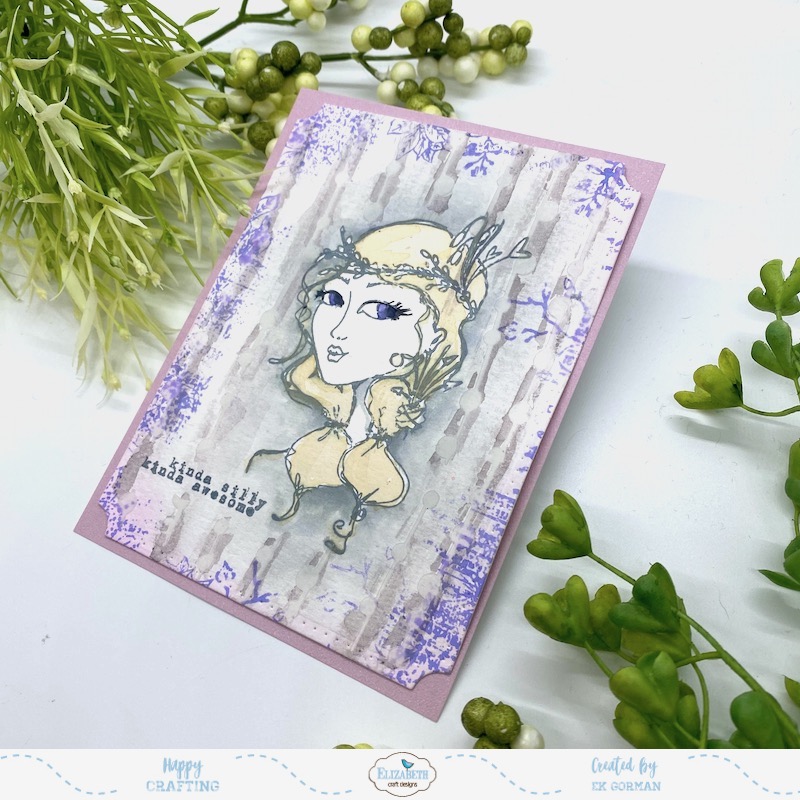 Step Nine: Die cut the watercolor paper with the Stitched Indented Rectangle die set and adhere it to a piece of trimmed Dusky Lavender Soft Finish Cardstock trimmed to 4.25×5.5 inches using 10mm Clear Doubled Sided Adhesive. Add the Soft Finish Cardstock to an A2 card frame.
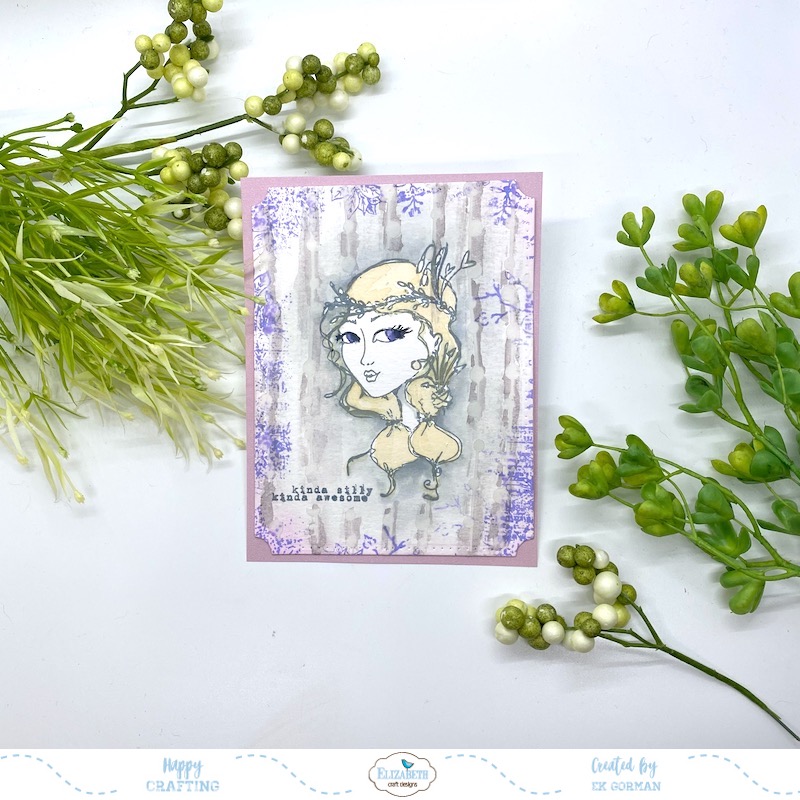 I love how the pale grey and purple tones have a vintage vibe, but in a fun colorful way.


 Hey everyone! It’s EK, and I am popping into to share a one layered card to inspire someone right now. I don’t know about you, but morale is a little low in my house, so I thought maybe I should make some cards to help inspire my kiddos to do their best work. I just love how the Soar Collection stamp set by Suzanne Cannon is filled with inspirational quotes perfect to inspire anyone.
 Step One: Trim a piece of 90lb Soft Finish Cardstock to 4.25×5.5 inches. Trim a circle out of a piece of masking tape and adhere it to the cardstock.
 Step Two: Blend some water reactive inks onto the Soft Finish Cardstock to create a night sky. I used Distress Oxides in Chipped Sapphire, Dusty Concord, and Hickory Smoke.
 Step Three: Using a black water reactive ink, blend ink around the edges of the cardstock to ground the image. I used Distress Oxide Black Soot.
 Step Four: Using both clean water and an iridescent spray, splatter the cardstock to create stars.
 Step Five: Peel off the mask to expose the moon. Add some pale blue ink to the revealed area. I used Distress Oxide in Tumbled Glass.
 Step Six: Tape the A Way With Words Flourished Frame stencil from Suzanne Cannon over the inked cardstock.
 Step Seven: Blend white pigment ink through the Flourished Frame stencil to create a frame around the card.
 Step Eight: Stamp a sentiment onto the card frame from the A Way with Words Soar Collection stamp set. To be honest, any of the sentiments on the card would be perfect for this card, but I went with the Shoot for the moon sentiment.
 I really love how with just a stencil, a stamp set and some ink you can create a really inspiring card. All of Suzanne Cannon’s sentiment stamp sets are perfect to create on layered inked cards. If you don’t have any, check out her full line. Let us know what your favorite A Way with Words sentiment is in the comments below. Until then, happy crafting.


