Monthly Archives

January 2015

A Charming Shimmer Sheetz Necklace

January 31, 2015

???????????????????????????????

 A Charming Shimmer Sheetz Necklace
By Judi Kauffman for Elizabeth Craft Designs

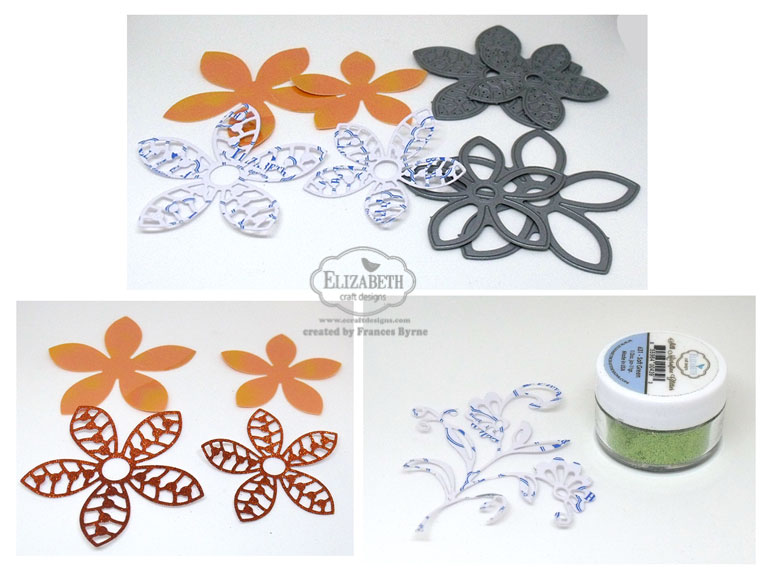
Judi Kauffman is back as today’s Guest Designer with a super easy necklace that catches the light and is sure to elicit lots of compliments. This jewelry is made with Shimmer Sheetz using the new Jewelry Die sets. This necklace took about half an hour to make.

Here’s how:

1. Layer 2 pieces of Fire Opal Gemstone Shimmer Sheetz with a piece of Elizabeth Craft Designs’ Transparent Double Sided Adhesive Sheet in between.
*Note: A 2-layer 4” x 5” piece will be more than enough to make a 3-charm necklace, with enough left over for earrings or another necklace.

2. Using an ink applicator tool, dab on alcohol inks in two or more colors on one side of the double thickness Shimmer Sheetz made in step 1. I chose Espresso and Metallic Gold Mixatives, feel free to vary. Allow some of the original color in the Fire Opal Shimmer Sheetz to remain visible.
*Note: The ink-altered side will be the FRONT of the charms.

3. Lightly sand the other side of the double thickness Shimmer Sheetz.
*Note: The unaltered sanded side will be the BACK of the charms.

4. Die cut one each of the three Jewelry Die 1 Sea Glass shapes shown.  Cut a second time with the smaller shape inside the larger one so the pieces are open at the center, creating three “ring” shapes. (There are 8 dies in the Jewelry Dies 1 Sea Glass set, 4 large and 4 small – This project does not include the two long narrow shapes.)

REMEMBER – You MUST use the Metal Adaptor Plate as follows for die cutting Shimmer Sheetz:
Inside your machine’s standard cutting plate sandwich, place in this order – Metal Adaptor Plate, altered Shimmer Sheetz facing UP, dies with cutting side facing DOWN.

5. Emboss the three charms using your favorite allover pattern embossing folder. (Shown: Fleur de Lis). Make sure that the raised design is on the FRONT side of the charms. Use a sanding block and very little hand pressure to lightly sand the charms, revealing the silver core of the Gemstone Shimmer Sheetz. (Don’t sand too much or you’ll lose the color contrast created with the alcohol inks in step 2.)
*Note: If you have substituted an Iridescent color, when you sand the charms you will reveal the white core of the Shimmer Sheetz.

6. Punch a 1/16” hole at the top of each charm and a second hole directly below the first one, closer to the opening in the ring shape.

7. Using head pins to make mini charms, add one or more beads to the inside of each charm. Use a jump ring to attach one of the charms to the necklace (chain link). Use eye pins and beads to make longer dangles for the other two charms. Silver seed beads echo the color of the chain; pearls and square quartz beads pick up the colors in the Shimmer Sheetz!

OPTIONS:

*Make more charms, space the charms farther apart or closer together.

*Feel free to use the Jewelry Die 2 Droplets or mix the two sets.

*Instead of a chain link necklace, attach all 3 charms to one jump ring to create a muliti-dangle pendant and suspend from a leather cord.

*For a contrasting reverse side use two Shimmer Sheetz colors instead of just one.

*Alter Shimmer Sheetz with more or different alcohol inks.

*Use alcohol inks on both sides (don’t sand either side until step 5).

Supplies:

Elizabeth Craft Designs

Other 

  • Tim Holtz Ink Applicator Tool (Ranger)
  • Tim Holtz Alcohol inks in Espresso and Gold Metallic Mixatives
  • Sanding block (fine grit)
  • 1/16″ hole punch
  • Beads: silver seed beads, small ivory pearls, and quartz squares
  • Head pins
  • Eye pins
  • Necklace chain
  • Jump ring
  • Chain nose pliers (Artistic Wire)
Pop it Ups

Flower Quartet Pull Card

January 30, 2015

Hello, it’s Joset here today with an easy, fun Flower Quartet Pull card. I used the new Flower Quartet Peel-offs that are the perfect match for Karen Burniston’s new Rectangle Pull Card die. I used the little Spinner die included in the Rectangle Pull Card set so when the card is opened a small flower pops up. The second card uses Flower Quartet Peel-offs, too. It’s a traditional side-fold card with a vertical greeting at the side. I hope you will enjoy this tutorial and will soon make your own version of these cards.

Pull Card

1. Cut purple cardstock 7 1/2 x 5 1/2. Score and fold in half. Cut patterned paper the same size. Score and fold in half.

2. Open both cards and layer patterned paper on top of purple cardstock. Place Rectangle Pull Card die at the score line and run both cards through your die cutting machine. Fold purple card to create the pull. Karen has a great You Tube video showing you how to create a Rectangle Pull Card. View video HERE.

3. Trim each side of the patterned paper a few inches. Cut pattern paper just after the first score where the rectangle frame starts. Adhere this portion to your purple rectangle card. Now cut at the second score line (were the center fold of your pattern paper was). Adhere the right portion of your patterned paper to the right portion of your purple card. Set aside the middle portion with rectangle frame for another use (it is not needed for this project). Cut out the small pull label of the patterned paper. Refer to the photo below.

Pull card open

4. Die cut spinner from purple cardstock and adhere on the inside of the card.

5. The Flower Quartet Peel-off and the little flower on the spinner I colored on top of the Warm Diamond Silk Microfine Glitter. View this video by Els van de Burgt HERE, showing you how to color on top of the Silk Microfine Glitter. You can use any kind of alcohol marker for this technique.

6. Cut out peel-offs. Adhere Flower Quartet on purple rectangle portion of the card.
Adhere small flower peel-off on spinner so when you open the card the flower pops up.

Pull card flower

7. To decorate my card I cut two purple edges using the new Katie Flourish Frame Edges
(I used the longest edge die from the 2 in the set). Adhere a piece of Transparent Double Side Tape Sheet to purple cardstock first, then die cut edges. Remove release sheet and adhere edges on each end of the card.

Here is the second card that I created using the Flower Quartet Peel-off on a flat A2 size card. For this card I also used the new Alphabet 1 – Caps and the little corners from Tags & More 7 – Vine.

SONY DSC

1. Cut purple cardstock 8 1/2 x 5 1/2. Score and fold in half.

2. Cut patterned paper 4 1/8 x 5 3/8 and adhere to card front.

3. Color Flower Quartet Peel-off on top of Warm Diamond Silk Microfine Glitter using the same technique as we used in the Flower Quartet Pull Card. Cut out Peel-off.

4. Cut a small piece of purple cardstock 2 3/8 x 3 5/8. Adhere your Flower Quartet Peel-off on top. Adhere both to card front as shown.

5. Adhere a piece Purple Iridescent Shimmer Sheetz to Transparant Double Sided Tape Sheet large enough to cut 3 corner decorators. Cut the 3 corners using the corner die included in Tags & More 7 – Vine (use Metal Adaptor Plate for cutting, remember that the cutting side of the die needs to face the Adaptor Plate with the Shimmer Sheetz in between).
Adhere corners at top left, bottom left, and bottom right. Optional: Accent each Shimmer Sheetz corner with a Violet/Silver Glitter Dot Peel-off.

Hello Close Up 1

6. Die cut Hello from purple cardstock using Alphabet 1 – Caps. Adhere to card front.

7. Optional: Add Hearts Glitter Border Peel-Offs between the Shimmer Sheetz corners at the left side and across the bottom of the card front.Hello Close up 2

I hope you will try out these fun new Peel-Offs in combination with the Rectangle Pull Card, for a traditional side-fold (flat) card. And don’t forget, the Peel-Offs are also the perfect fit for Karen Burniston’s Accordion Rectangle Card die!

Happy crafting!

Joset

SUPPLIES:

Elizabeth Craft Designs –
974 Rectangle Pull Card
977 Katie Flourish Frame Edges
960 Tags & More – Vine (to cut corners pieces on flat card)
2589 Flower Quartet Peel-off in Gold
502 Transparant Double Sided Tape Sheets
639 Warm Diamond Silk Microfine Glitter
977 Katie Flourish Frame Edges
SS 0106 Purple Iridescent Shimmer Sheetz
7010 Violet/Silver Glitter Dots
7022 – Silver/Gold Hearts Glitter Borders
803 Metal Adaptor Plate
802 Pine Pointed Scissors

Other –
Purple Cardstock – Bazzil
Patterned Paper – Graphic 45 – Time to Flourish Collection
Copic Markers – Colors used: B79, V09, BV11, G99, YG25, Y15, 0 Colorless Blender
Die cutting machine
Trimmer


ECD Jewelry – Red Shimmer Pine Sprig Earrings

January 29, 2015

Earrings

Hello everyone, it’s Mary here today. This is the first time that I’m trying out the new Jewelry dies from Elizabeth Craft Designs. I think the earrings came out pretty well! They sparkle much more than they appear in the image due to the beautiful Shimmer Sheetz. I added some Ice Resin to the die cut Shimmer Sheetz earrings which dries up clear and smooth.

Making the Earrings

1. Cut 4 pieces of craft foam large enough to accommodate your chosen jewelry die plus space around it. Cut one piece with the die from the front and one piece from the back (this mainly only matters if the foam has adhesive on it already, otherwise just flip one after cutting). Stick each of the cut pieces to the non cut pieces so one is flipped compared to the other; these will form 2 molds. Note: in my photo below, the foam I used on the bottom was yellow and the foam that I die cut was blue.

2. Seal the molds. I used a thin coat of Multi-Meduim but it came off when I removed the jewelry (which gave the backs a matte texture). You may want to try silicone or other sealer plus a release agent.

3. Using one of the jewelry dies from Jewelry 1, cut 2 pieces from Red Metallic Shimmer Sheetz (use metal adaptor plate with your die cutting machine). Cut one from the front of the sheet and one from the back so one will be a flipped image of the other.

Making Earrings

4. Emboss the cut pieces using the Sprig embossing folder by placing each as desired in the folder and temporarily securing them with tape before running them through your die cutting machine (this will keep the pieces from moving). I wanted the sprigs to pop up so I oriented them as such.

5. Sand the embossed side of the sprigs using a sanding block. Paint them with Patina paints as desired (acrylic will likely work as well). Let this dry.

6. Mix Ice Resin as directed, enough to fill both molds. Spread a very small amount into the bottom of each mold – just enough to cover the very bottom. Place your jewelry pieces (painted side up) into the bottom of the molds. Pour more Ice Resin into the molds, just enough to fill them and evenly cover the metallic pieces.

7. Let this dry at least one day or so, until they are mostly dry but still slightly flexible. Remove from molds. Sand edges if necessary. If you would like a curve in them, place them face down into a large tape roll. Press them against the side to give them a curve. Tape to hold them in place against the roll.

8. Let them dry until completely cured, about two more days. Drill small holes in the tops (I used a Dremel tool with a very small drill bit placed on an old rubber mouse pad). Polish edges if desired. Mount on dangle earring wires.

9. To make the card, cut a piece of white cardstock large enough for the earrings to dangle plus room for the stamped sentiment above. Stamp, punch holes for the earrings, and thread the wires through.

Supplies

ECD Supplies

Other Supplies

  • Craft Foam (e.g. Fun Foam)
  • Sanding Block
  • Ice Resin
  • Studio Multi-Medium, Matte
  • Patina by Ranger: Emerald, Jade
  • Gold Dangle Earring Bases
  • White Cardstock
  • Stamps
  • Ink: Red, Black
Pop it Ups

Pop It Ups Wednesday With Raquel – Rubber Ducky Bathtub Card

January 28, 2015

Hello my crafty friends, it’s Raquel Mason here with Pop It Ups Wednesday!  I see so many possibilities with Karen Burniston’s new Pop Stand dies.  Here’s just one way to make to make an additional pop up element in your card.  I added a Mommy Rubber Ducky watching over her babies as they frolic in the bathtub.   Let me show you how I made this card.

KB ECD Bathtub Rubber Duck

KB ECD Bathtub Rubber Duck open

1.  Cut pink cardstock at 5.5 x 8.5 score at 4.25.

2.  Place Pop Stand die on the score line of card base as shown in photo below.

KB ECD Bathtub Rubber Duck cutting

3.  Cut pattern paper at 3.5 x 5.5 and adhere to front.  Cut pattern paper at (2) 1.5 x 5.5 and adhere inside top and bottom of card.  Use photo for placement.

4.  Die cut the following pieces shown in photo:

From Rectangle Pull Card: pink cardstock (1) spinner and (3) small rectangles – pattern paper (1) large rectangle – green cardstock (3) frames.

From Bathtub Pop Stand: pattern paper (2) bathtubs -white cardstock (3) sets of claw feet and (2) bathtub top portion only cut along the score line -White Iris Shimmer Sheetz (2) row of bubbles and (1) set of loose bubbles – Silver Metallic Shimmer Sheetz (1) faucet – yellow cardstock (5) small ducks.

From Rubber Ducky: yellow cardstock (1) duck and (1) wing – orange cardstock (1) beak – black cardstock (1) eye.

From It’s a Girl/Boy: white cardstock (3) sets of It’s a Girl.

KB ECD Bathtub Rubber Duck pieces

5.  Assemble pieces from step 4.   Adhere large rectangle to front of card. Adhere green frames to small pink rectangles, add (3) small ducks in the frames then adhere to front of card.   Adhere all 3 layers of sentiment together then adhere to front of card.  Adhere claw feet to bathtub.  Optional: I adhered a set of claw feet to the inside facing tub as well as the back side.   Adhere white bathtub edge to both bathtubs.  Adhere both rows of bubbles, (2) small ducks and faucet to the inside edge of the bathtub.   Adhere loose bubbles over the bathtub edge.   Adhere wing, beak and eye onto Rubber Ducky.

6.  Thread 7.5″ ribbon through holes of card base and tie a knot on front of card.

7.  Adhere bathtub to Pop Stand.  Place bathtub right side down on the card so feet are lined up with the tabs.  Apply adhesive to the top facing side of the tabs then press tabs onto feet to adhere.  Repeat this step for the other side.

KB ECD Bathtub Rubber Duck glue tub

8.  Work the 3 folds in the spinner.  Adhere one spinner end to card floor with the edge touching the edge of the bathtub feet.  Adhere other spinner end to the bathtub feet.  See photo below.

KB ECD Rubber Duck spinner

9.  Adhere duck to front of spinner.

KB ECD Bathtub Rubber Duck completed side view

10.  Add Glitter Border Lines and Glitter Dots per photo.

KB ECD Bathtub Rubber Duck close up open

I hope you have enjoyed my tutorial and feel inspired to try it out yourself.

Happy Crafting,

Raquel

Elizabeth Craft Designs Supplies:

980 Bathtub with Pop Stand

974 Rectangle Pull Card

920 Rubber Ducky

969 It’s a Boy/Girl

SS0102 White Iris Shimmer Sheetz

SS0211 Silver Metallic Shimmer Sheetz

7010 Glitter Borders Pink/Silver

7018 Glitter Dots Pink/Silver

Other Supplies:

Pretty in Pink, Pumpkin Pie, Certainly Celery, Whisper White, Barely Banana cardstock from Stampin’ Up!

pattern paper from SEI

white ribbon from my stash


Uncategorized

My Country Valentine~

January 27, 2015

Hi, it’s Susan Tierney-Cockburn here today with my first project at the Elizabeth Craft Designs Blog. One of my latest designs with Elizabeth Craft Designs is CountryScapes.
For today’s project I’ve assembled a few of the dies from that collection to show you this cute St. Valentine’s Day card.

IMG_0203

Instructions

  • Cut A6 card from the Card Shoppe Marshmallow and the 2nd layer from the Watercolor paper (4-inches x 5 3/4-inches).
  • Start by stenciling clouds with Turquoise Shade of PanPastels using a soft cosmetic sponge. Sponge grassy area with Bright Yellow Green and Chromium Oxide Green PanPastel. Adhere to A6 card.
  • Die cut the grasses and clump from the 80# yellow-green cardstock and shade with Ranger’s Distress Ink/Olive Green. Set in place on the card.
  • Die cut one Birch Tree and two branches from 80# white cardstock layered with ECD Transparent Double Sided Tape and one from 140# cardstock. Adhere the two trees together. This gives the tree some dimension and lift. Use Copic W1 to color the tree and PanPastel’s Paynes Grey Tint to shade the tree. Set in place on the left side of the card, allowing the tops of the tree to extend above the card.
  • Die cut the leaves out of a yellow-green cardstock 9 times to fill the tree. Place on the leaf pad and with the Leaf tool, draw a line down the center. Pinch the tip end, then lightly dip into the glue and adhere to the tree branches.
  • On a non-stick mat create the hearts by dispensing two small dots of the Viva Decor Pearl Pen and using a toothpick to draw down between them. Allow to dry 30 minutes.
  • Die cut Geraniums and Flower Pot from Backyard 1 set in 80#white cardstock.
    Color with Copic pens. Use the medium ball stylus from the tool kit and shape the flower pot. Add a 3-D dot to the back and adhere to the right side of the card. Set the leaves/stem and flower heads in place. Punch tiny red hearts and adhere to the flower heads. Lightly color with the Sakura Gelly Roll pen.
  • Adhere a small piece of ECD Transparent Double Sided Tape to 80# white cardstock and die cut alphabet letters for L O V E.
  • Gently peel away lining and sprinkle each letter with a different color of Silk Microfine Glitter, or use one color–your choice.
  • Die cut Crow from 80# cardstock; color and shade with Copic B99 and 100 Black.
    Add a small punched red heart to the breast area and color it with the Sakura Pen. Adhere Crow to the branch with a 3-D dot.
  • Adhere the letters as shown.
  • Finally, stamp the phrase–”The Best Things in Life aren’t Things” on 80# white cardstock, deckle the edges and shade with Copic R37 pen. Adhere to the upper right corner.

Supplies:

Elizabeth Craft Designs – 

Susan’s Garden Line:

988 CountryScapes – Backyard 1

989 CountryScapes – Country Critters 1

991 CountryScapes – Country Flora 1

992 CountryScapes – The Woods 1

RS009 The Best Things in Life

808 Susan’s Garden 4pcs. Tool Set

ECD other:

WP903 Watercolor paper 90 lbs

503 Transparant Double Sided Tape Sheet

Silk Microfine Glitter616 Peony Pink615 Ruby614 True Red, & 619 Fuchsia

Other – 

Cloud Stencil

Leaf Pad

PanPastels KitII & Paynes Grey Tint

Viva Decor–Pearl Pen/Red

Sakura Gelly Roll Pen/Clear

Ranger’s Distress Ink/Olive Green

Copic Pens – W1, YR27, E09, R37, B99, 100 Black

Bazzill Paper Co 100# Card Shoppe/Marshmallow

80# white cardstock

80# Yellow Green cardstock

The French Paper Company 140# Paper/Brown

Small heart hand punch


With Sympathy

January 26, 2015

ECD_sympathy_Candy_Spiegel

Hi,it’s Candy here! Sympathy cards are always a challenge for me to make. I wanted this one to be elegant, so I chose classic papers from Anna Griffin and accented them with Black Velvet Adhesive Sheet. By changing the sentiment, this card is one that would serve well for weddings, anniversaries, even for a college graduation.

1. Cut black cardstock 4.25″ x 11″. Score and fold in half to make the card base.

2. Cut patterned paper 4 1/8″ x 5 3/8″. Adhere to card front.

3. Cut out sentiment from Black Velvet Adhesive Paper. Peel off backing and adhere to card.

4. Cut both of the flowers and the smaller flower center from the Victorian Flower Set 1 out of patterned paper.

5. Cut both of the flower overlays and the larger flower center from the Victorian Flower Overlay Set 2 out of Black Velvet Adhesive Paper.

6. Peel off the backing from the overlay die cuts and adhere them to the paper flowers.

7. Adhere the larger flower to the card. Adhere just the center of the smaller flower on top of the larger flower, as shown. Add the velvet flower center to the center of the flowers. Add the patterned center on top.

8. Fluff up the petals on the top flower, if desired.
SUPPLIES:

Elizabeth Craft Designs:

964 Victorian Flower Set 1

966 Victorian Flower Overlay Set 2

737 With Sympathy

406 Black Velvet Adhesive Sheet

Other Supplies:

Black cardstock

Patterned paper – Anna Griffin


Victorian Flower

January 25, 2015


ECDFlowerwm

Hi everyone,

It’s Frances here. Have you seen all the new Tags & More Dies available from Elizabeth Craft Designs? There are now 8 different Tags & More die sets covering 3 different widths,
2 1/4 inches, 3 1/4 inches and 4 1/4 inches. So whatever your needs are, we have the Tags & More set for you! For today’s project I am using the Tags & More 6 – Daisy with the new Victorian Flower die sets.

Here is how I created my card:

1. Cut a piece of designer paper 5 1/8 inches x 3 7/8 inches and layer this onto a piece of green card that is 5 3/8 inches x 4 1/16 inches. Layers these to a folded orange card which is 5 1/2 inches x 4 1/4 inches.

2. From the Tags & More 6 – Daisy die set, die cut 4 of the corner pieces from the orange card. Layer these to the green card and trim around them with scissors. Adhere the corners to each corner of the card.

3. Position the main tag die from the Tags & More 6 –  Daisy onto a piece of green card which is 2 3/4 inches x 5 1/2 inches. Run through your die cutting machine. Now position decorative overlay over the tag so the hole in the overlay lines up with the hole in the tag and also lines up with the tag shape of the card. Run this through your die cutting machine.

Use your trimmer to trim down both sides of the card so the edge is level with the part of the tag which was cut by the die. Use the Spring Leaves Embossing Folder to emboss tag.

Die cut another tag from the orange card without adding the decorative layer and adhere this under the green tag. Trim tag so it measures approx 4 5/8 inches. Thread some orange hemp cord through the hole of the tag and adhere to the card as per photo.

ECDFlower1wm

4. Use the flower dies from the Victorian Flower Set 1 to die cut a large and small flower from Orange Iridescent Shimmer Sheetz. Make sure to use the metal adaptor plate when die cutting Shimmer Sheetz.

Cut a piece of white card big enough to fit both flowers from the Victorian Flower Overlay Set 2 and cover the front of the card with a piece of Elizabeth Craft Designs Transparent Double Sided Adhesive Tape Sheet. You can find some tips on how to cut these intricate flowers in a You Tube video by Els van de Burgt. Click HERE to watch the video.

Remove the protective backing from the tape and cover the flower with Orange Silk Microfine Glitter. Remove excess glitter and polish the glittered flowers with your finger.

Layer the glittered flowers to the Shimmer Sheetz flower and then layer these together.

Die cut the large circle included in the die set and cover this with Gold Glitter Dots. Assemble Flower.

5. Cut a piece of card big enough to fit the Flourish with Flowers and apply a piece of Elizabeth Craft Designs Transparent Double Sided Adhesive Tape Sheet to the front. Die cut, remove protective backing and cover with Soft Green Silk Microfine Glitter. Remove excess glitter from flower and polish with finger.

6. Adhere Flourish with Flower to card as per photo and then add the assembled flower.

Thanks for stopping by today!

Supplies: 

Elizabeth Craft Designs
Tags & More 6 – Daisy (959)
Victorian Flower Set 1 (964)
Victorian Flower Overlay Set 2 (966)

Flourish with Flowers (797)
Orange Silk Microfine Glitter (613)
Soft Green Silk Microfine Glitter (631)

Orange Iridescent Shimmer Sheetz (SS  0109)
Transparent Double Sided Tape Sheet (502)
Spring Leaves Embossing Folder (E118)
Gold/Silver Glitter Dots (SKU 7018)
Metal Adaptor Plate (803)
 
Other
White Card
Green Card
Orange Card
Kalahari Dreams Designer Paper – Wild Rose Studio
Foam Tape


Pop it Ups

Hydrangea Oval Accordion Card

January 24, 2015

Hello everyone, It’s Els van de Burgt here, excited to share this Hydrangea Oval Accordion Card with you today. For this card I included something of Karen’s Pop It Ups line, something of Susan’s Garden line and of course something of my own line, the Hydrangea Peel-offs. 
I used Karen’s Accordion Oval Card because it’s the perfect fit for the Hydrangea and for Susan Tierney-Cockburn’s Seeds of Thought stamp – “Take time to do what makes your soul happy.”

Collins 2

Here is how I created my card:

1. Die cut 2 accordion pages from green cardstock and 2 from blue dot pattern paper.
Place your two green pages in front of you with all tabs facing to the right. Adhere pages together using double sided adhesive on the long side tab of the left page. Trim long side tab and small tab around oval of the right page.

Ovals

2. Trim the long side tab from the two blue dot accordion pages and cut out center oval.
Trim any other tabs from the two accordion pages so you’re left with just two frames.
Ink edges with green. Adhere frames to the inside of the accordion card. Adhere edges of oval with green as well and adhere them to the inside of the card on top of the green ovals.

3. Adhere a piece of transparent double sided adhesive to white cardstock large enough to fit Hydrangea Peel-off. Transfer peel-off onto the adhesive using a technique I’m demonstrating in one of my videos “Silk Microfine Glitter – Coloring with Alcohol Markers”. Once your peel-off is transferred, cover your peel-off with Cool Diamond Silk Microfine Glitter. Polish and Brush off excess glitter. Color flowers with Copic markers or any alcohol marker. In the picture below you can see that I start with coloring the flowers with the aqua color and add darker blue to the center. Then I used my lighter aqua again to blend the two colors.

Copic

4. Carefully cut around Hydrangea. I like to use my fine pointed scissors. Adhere Hydrangea on oval of left accordion page as shown.

5. Stamp sentiment on watercolor paper using black Dye Ink. Using the largest oval accessory die, cut out sentiment. Add stitches using the stitches accessory die from the same set.
The reason why I’m adding the stitches, is when I’m decorating my oval with the Glitter Dots,
I can line then up nicely on the stitches.

Oval stitches

6. Ink edges with green using a round blending tool with foam applicator. Make circular motion when adding the ink.

Distress

7. Add Glitter Dots around sentiment using the stitches for placement.

Glitter Dots

8. Adhere sentiment on oval of right accordion page as shown.

I love how this card turned out. Combining Karen’s and Susan’s designs with my own is so much fun. Have you seen the new Peel-offs yet that match the Accordion Star, Accordion Rectangle and Rectangle Pull Card? You can find all 3 new designs plus the new dies at our website www.ecraftdesigns.com.

Happy Crafting,

Els

SUPPLIES:

Elizabeth Craft Designs –

772 Accordion Oval Card

2546 Hydrangea Peel-offs in Black

RS008 Seeds of Thought stamp “Take time to do what makes your soul happy”

503 Transparant Double Sided Tape Sheets

641 Cool Diamond Silk Microfine Glitter

7018 Transparent/Gold Glitter Dots

WP903 Watercolor Paper

Other – 

Green cardstock – Bazzill

Patterned Paper – Graphic 45

Black Dye Ink – Memento

Distress Ink color Peeled Paint – Tim Holtz

Ink Blending Tool


Foxy Birthday Lattice Tag Card

January 23, 2015

Hello Crafty Friends,

Debra here today. January marks the beginning of a busy birthday season for my family. That means I need more birthday cards! The new Tags & More 8 – Lattice is a perfect base to build a fun card featuring a colorful Dutch the Fox, a few accessories and some sparkly birthday Balloon Peel-Offs.

ECD 2015 NR Fox 3a P1070505

This card works for either boys or girls and is easy to make. The Tags & More 8 – Lattice does all the work for you!

Here’s how I made this card:

1. Fold a  51/2″ x 8 1/2″ piece of white card base in half to form a standard A2 size card base. Cut a piece of pattern paper to 4 1/4″ x 5 1/2″. Die cut the top of the folded card base and the pattern paper with the Tags & More 8 – Lattice basic tag shape die. Die cut the top of the pattern paper with the decorative overlay die from the same set. Save the negative squares from the cut. Die cut Dutch the fox, hat and mustache. Using the curvy line die from Outdoor edges, die cut a  2″ x 4 1/4″ piece of pattern paper in the middle.

ECD 2015 NR fox dies 1a P1070496

2. Cover a piece of white cardstock with ECD Transparent Double Sided Adhesive sheet. Peel off liner and set aside. Add balloons peel-offs, sticky side up on the release sheet. Place adhesive covered cardstock over release sheet to transfer peel-offs. Remove liner and cover peel-offs and adhesive with Warm Diamond Silk Microfine Glitter. Polish with your finger to set the glitter and bring up the shine.

ECD 2015 NR fox peel offs 1a P1070495

3. Color balloons with alcohol markers. I used Copic (colors YG05, V17, B93, Y06). Trim colored balloons closely. Using a black marker, color the white cut edges for a more finished look.

4. Assemble card. Adhere green tag with decorative top to card front. Place a few squares from the overlay die cut back into the top for interest. Add wavy cut pattern paper to bottom of card front. Assemble Dutch, leaving his right legs unadhered. Add mustache and hat to Dutch. Tie a piece of black twine to Dutch’s right leg to attach to the balloon peel-offs. Here’s a close up:

ECD 2015 NR Fox 3 P1070505 (414x379)

5. Add Dutch and balloons to card front using foam adhesive. Attach twine from Dutch’s foot to bottom of balloons. Loop yellow ribbon through tag hole of front of card only.

6. Adhere 2nd half of wavy cut pattern paper and a single colored balloon to inside of the card. Add large Happy Birthday Peel-off in black to complete the card.

ECD 2015 NR Fox inside 1a P1070507

I love the way this card turned out and plan to make several of them to add to my birthday stash. With the Tags & More 8 – Lattice die doing all the detail work, its quick easy and fun! Thanks for stopping by today!

Elizabeth Craft Designs supplies used:
961 Tags & More 8 – Lattice
914 Outdoor Edges
946 Dutch the Fox
2552 Balloons Peel-Offs in Black
2577 Happy Birthday Large Peel-Offs in Black
Elizabeth Craft Designs Double Sided Adhesive
640 Warm Diamond Silk Microfine Glitter

Other Supplies:
Pattern Paper
Cardstock- Bazzill
Foam Adhesive


Uncategorized

Peony and Hydrangea Thank You Card

January 22, 2015

Peony_Hydrangea FrontCreated by Mary Dimercurio Prasad for Elizabeth Craft Designs

Making the Card

1. Cut blue cardstock 5.5 x 8.5 inches; fold in half to form an A2 sized card base. Cut pink cardstock 4 x 5.25 inches.

2. Die cut black cardstock, Light Blue Metallic Shimmer Sheetz and Raspberry Metallic Shimmer Sheetz using the Garden Patch 1 1/2-inch & Mini Petals main die. Die cut Thank You sentiment from Raspberry Metallic Shimmer Sheetz (use Metal Adaptor Plate to die cut Shimmer Sheetz). Die cut 2 more copies of Thank You from pink cardstock. Glue the Thank You words in a stack to form thick words, with the Shimmer Sheetz on top.

3. Adhere the black frame to the pink cardstock (step 1), centered at the top (long side) as shown.

4. Emboss square pieces of Raspberry Metallic Shimmer Sheetz using Bouquet folder, emboss blue pieces using Dancing Leaves folder. Tap/rub StazOn Black ink across the tops to enhance the design. Adhere into black frame using Elizabeth Craft Designs’ Transparent Double Sided Tape, alternating designs. Add blue ribbon around the bottom of the pink cardstock with squares as shown. Adhere pink cardstock to front of card base. Adhere stacked Thank You to card over ribbon as shown.

5. Using Hydrangea and Peony dies, die cut stems and leaves from green cardstock, Peony petals from light pink cardstock (cut about 3 copies of the single petal sets), Hydrangea flowers from cream cardstock (2 sets of flowers), and Peony center (stamen) from yellow cardstock (cut 2 copies).

Process Making Peony

6. Lightly ink all edges of cream flowers with Salty Ocean Distress Ink using an ink blending tool. Watercolor petals of Peony with Picked Raspberry Distress Ink: get each petal wet with a brush and water, add a small amount of color most of the way up the petal, then intensify the color at the base. Watercolor the leaves using Mowed Lawn Distress Ink: darker green in shaded areas (base of leaves), let dry then use a small brush to add veins. Add green shadows to the stems as well, along one side.

7. Shape the leaves and petals: rub the middle of the Hydrangea flowers with a small round stylus. Run a stylus around the back edge of each Peony Petal (including the ones that form the base), flip and rub with a large stylus or end of a die pick from the base about half way towards the tips – choose about 6 petals to shape the opposite way to go around the center and on the Peony bud (one very small and one small for bud), i.e. these will curve inwards while the others will curve outwards.

8. Cut the yellow stamen stalks (filaments) down the middles maybe 2/3rds of the way down. Add glue along the bottom edge of one, roll tightly along the bottom edge. Add glue to the other and roll it around the first. Spread the filaments out a bit with your finger.

9. Add a small dot (e.g. with toothpick) of Baby Blue Liquid Pearls to the centers of each of the Hydrangea flowers. With a large stylus or end of die pick, rub the back of the round Hydrangea base (top of stem) to form a cup. Add something to the cup to give it support from behind – I used a large enamel dot but you could fill it with Glossy Accents, Silicone Glue, or even dimensional tape (cut in circle). Glue the flowers to the outside. You may have to adhere a few on opposite sides then let them dry before adding more so they won’t shift on you.

Peony_Hydrangea Close Up

10. For the Peony bud, find the base (one with embossed lines), glue the small sized then the very small sized petals you reserved, as shown in photo. For the main Peony, rub the petal base in the center to give it a bit of a cupped shape (e.g. with the end of a die pick). Glue the stamen to the center. Glue the petals reserved for the center around the stamen then fill in the other petals.

11. Assemble and adhere stems, leaves, and flowers as shown. Don’t be afraid to trim a stem and/or move leaves to create the look you want. I cut an extra leaf for the Hydrangea (bottom) and glued it on top of its matching leaf, along the bottom edge, to make it pop out. Make a double bow with twine and adhere where stems meet.

Supplies

ECD Supplies

Other

  • Cardstock: Blue, Pink, Light Pink, Black, Green, Cream, Yellow
  • StazOn Ink: Black
  • Distress Ink: Mowed Lawn, Salty Ocean, Picked Raspberry
  • Liquid Pearls: Baby Blue
  • Blue Ribbon
  • Blue/Brown Twine
%d bloggers like this: